

Moosend is an email marketing tool a beginner can usually get running in an afternoon. That’s why it keeps showing up on shortlists for bloggers, small shops, and freelancers who want to send emails without a week of tutorials.
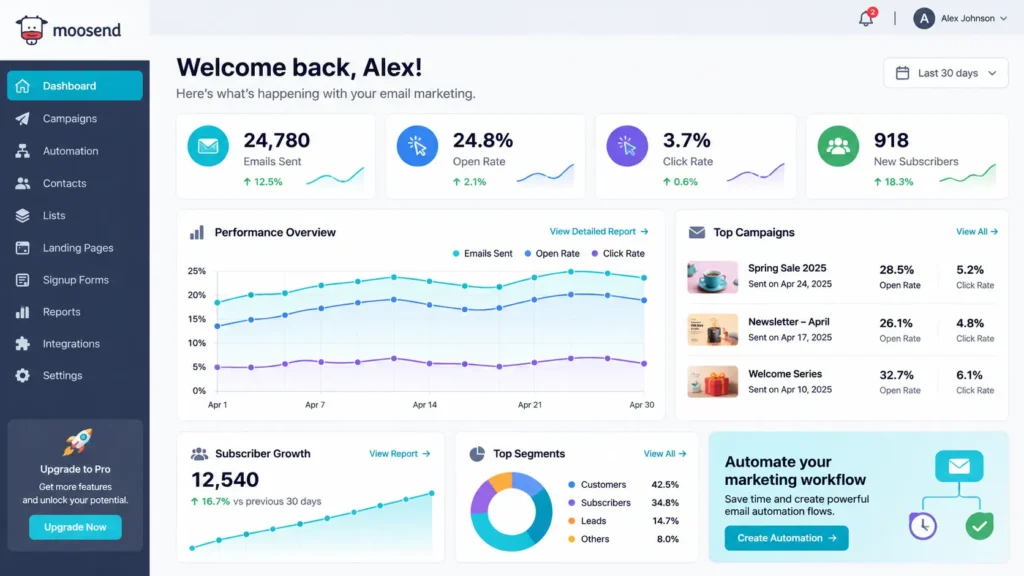
The dashboard still looks busy the first time you log in. Lists, segments, campaigns, automations, forms, reports. Which one comes first?
This guide covers how to use Moosend in the order you’ll actually need things: account, list, signup form, first campaign, automation, reports. I’ll flag what you can skip for now, too.
Quick disclosure: ToolCheckHQ may earn a commission if you buy through links on this page, at no extra cost to you. Our affiliate disclosure explains how that works.
What Moosend is and who it fits
Moosend is a cloud-based email marketing platform. You collect email addresses, sort them into lists, and send two kinds of emails: one-off campaigns
(a newsletter, a sale announcement) and automated emails that fire when someone does something, like joining your list or abandoning a cart.
It sits at the budget end of the market, in the same neighborhood as Mailchimp and MailerLite. Reviewers on GetApp keep praising the same thing: affordable pricing and a solid set of features even on the lower tiers.
Moosend fits best if you:
- run a blog or small website and want a newsletter
- own an online store and want abandoned cart emails
- freelance or run a small agency and send emails for clients
- have a list under 10,000 people and a tight budget
It fits less well if you need a full CRM with sales pipelines. Email is the whole point here.
What Moosend costs before you start
Pricing changes, so treat this section as a snapshot and check the live pricing page before you commit.
Recent pricing breakdowns describe a 30-day free trial with access to most features and up to 1,000 subscribers. No credit card is needed to start. Older articles mention a permanent free plan, but recent sources say it’s gone, so be careful with anything dated before 2025.
After the trial, the Pro plan starts at $9 a month for 500 subscribers. The price climbs as your list grows. One 2026 breakdown saw the same Pro plan at around $88 a month for 10,000 subscribers. Moosend+ and Enterprise are custom quotes, and there’s a pay-as-you-go credit option for seasonal sending.
My advice: use all 30 days. Build a list, send one real campaign, and set up one automation before the trial ends. That tells you more than any review will, including this one.
Want to follow along? Start your free Moosend trial and keep it open in a second tab.
Step 1: Create your account and verify your sender
Sign up with your email and a password. Moosend then asks for the basics, like your company name, website, and address. Have a mailing address ready. Every marketing email sent to US subscribers needs a physical address in the footer, and Moosend uses the details you enter here for that.
Next comes the part beginners skip: sender verification.
Your sender is the email address your campaigns come from. Moosend asks you to confirm it. If you own a domain, you can also authenticate it with SPF and DKIM records, which you add in your domain’s DNS settings.
Skip this and more of your emails will land in spam. Use a branded address like hello@yoursite.com, not a free Gmail address. Gmail and Yahoo started enforcing stricter bulk sender rules in 2024, and sending from a free inbox through a third-party tool is a bad look.
New to the tool? Create your Moosend account here and verify your sender first, before anything else.
Step 2: Build your first mailing list
Everything in Moosend runs on mailing lists. Open the Audience section (menu names shift a little between updates), create a list, and give it a name you’ll recognize in 6 months. “Blog subscribers” works. “List 1” doesn’t.
Then add people. You can:
- upload a CSV or Excel file
- paste addresses in by hand
- collect them through a signup form (Step 3)
- connect your store or website so new customers flow in
Only import people who agreed to hear from you. If your subscribers live in the US, UK, EU, or Australia, laws like CAN-SPAM, GDPR, and the Spam Act apply to you, and “I bought this list” is not a defense. It also wrecks your sending reputation fast.
Add a first name field while you’re here, so you can greet people by name.
One more tip: start with a single list. Beginners tend to create 5 lists on day one, then can’t remember who’s on which. Use segments later to slice one list into groups, like “bought something” or “clicked the guide”.
Step 3: Add a signup form or landing page
A list with no new subscribers is a dead end. Moosend has a form builder and a landing page builder, both drag and drop.
A form sits on your existing website. You build it, copy the embed code, and paste it into a page or sidebar. WordPress users can drop it into a custom HTML block.
A landing page is a standalone page with its own link. It’s the better pick if you don’t have a website yet, or if you want to send traffic from Pinterest, YouTube, or Facebook straight to a signup page.
Whichever you pick, give people a reason to join. A checklist, a discount code, a weekly tip. “Subscribe to our newsletter” is a weak offer. “Get the 1-page setup checklist” gives someone a reason to type their email.
Turn on double opt-in if you can. New subscribers confirm by clicking a link in an email. You’ll lose a few signups, but the people who stay actually want your emails, and that helps deliverability.
Step 4: Send your first campaign
Here’s how to use Moosend to send a regular campaign, start to finish:
- Click Create campaign and pick the regular campaign option.
- Name it. This is for you only, so “Nov newsletter 1” is fine.
- Write your subject line and preview text. Keep the subject short enough to read on a phone, roughly 40 to 50 characters.
- Set the sender name and the verified sender address from Step 1.
- Choose which list gets the email.
- Pick a template and edit it in the drag-and-drop editor.
- Send a test to yourself and check it on your phone.
- Hit send now, or schedule it.
On the design step, resist the urge to build something fancy. One column, one image, one button beats a 12-block layout for a first send. Plain emails often get more clicks than heavily designed ones, because they look like a message from a person.
Before you send, scroll to the footer and confirm your address and the unsubscribe link are there. Both are legally required in most tier one countries.
What about send time? It varies by audience, and I don’t trust any article that gives you a magic hour. Pick a weekday morning, then look at your reports and adjust.
Once you have a few hundred subscribers, try an A/B test. Moosend supports split testing, and the easiest thing to test is two versions of the same subject line.
Step 5: Set up your first automation (welcome series)
Automations are where Moosend earns its price. A workflow is a chain: a trigger starts it, then actions run, with optional waits and conditions in between.
Start with a welcome series. Moosend ships with ready-made workflow templates, and welcome emails and abandoned cart emails are among them. Open one and edit it instead of building from scratch.
A simple version looks like this:
- Trigger: someone joins your “Blog subscribers” list.
- Email 1, sent right away: say hi, deliver the freebie, tell them what to expect.
- Wait 2 days.
- Email 2: send your single best article. No pitch.
- Wait 3 days.
- Email 3: a soft mention of a tool or product you actually recommend.
That’s 3 emails you write once and never think about again. Every new subscriber gets the same warm start, even at 2am on a Sunday.
Store owners should set up the abandoned cart workflow next. Connect your store (Shopify and WooCommerce are both supported) and Moosend can email shoppers who left something in their cart. This is usually the first automation that pays for the whole subscription.
Want to build this welcome series yourself? Try Moosend free for 30 days and open a welcome template.
Step 6: Read your reports
After a send, open the reports section. A handful of numbers matter at the start: opens, clicks, unsubscribes, and bounces.
Treat opens with some suspicion. Apple Mail Privacy Protection loads emails in the background, which inflates open numbers. Clicks are the cleaner signal, so judge your emails by who clicked.
If unsubscribes jump after one campaign, my guess is the subject line promised something the email didn’t deliver, or you sent too often. If bounces are high, your list probably has old or mistyped addresses, and it’s time to clean it.
4 beginner mistakes to avoid
1. Importing a bought or scraped list. It tanks your sender reputation, and it breaks the law in plenty of places.
2. Skipping domain authentication. It takes 15 minutes and keeps you out of spam folders.
3. Building a huge automation first. Start with the welcome series. Add more once it works.
4. Emailing once every 3 months. Subscribers forget who you are. A short email every week or two keeps the list warm.
Moosend pros and cons
What works well:
- The $9 entry price is low for a tool with automation
- The drag-and-drop editor covers the basics without a learning curve
- The 30-day trial is long enough to test a real campaign
What to watch:
- Cost rises as your list grows, so run the numbers at 5,000 and 10,000 subscribers
- There’s no permanent free plan anymore, according to recent sources
- Some GetApp reviewers mention missing advanced features on the lower plans
I’d pick Moosend when budget matters and you need email plus basic automation. If you want sales pipelines too, look at a CRM-style tool.
Not sure yet? See Moosend’s current plans and trial details before you decide.
Frequently asked questions
Is Moosend free?
Not permanently. Recent sources describe a 30-day free trial with up to 1,000 subscribers and no credit card needed. After that you move to the Pro plan, which starts at $9 a month.
Is Moosend good for beginners?
Yes, mostly. The setup order is logical (list, form, campaign, automation), and the templates save you from designing from scratch. The tricky part for beginners isn’t the software, it’s sender verification and building a list the right way.
How long does it take to learn how to use Moosend?
I’d budget about 30 minutes for the account and first list, and another hour or two for your first campaign. A welcome automation takes a bit longer because you have to write the emails.
Can I use Moosend with WordPress?
Yes. You can embed a Moosend signup form on any WordPress page with the embed code, or use a plugin if you prefer. Landing pages work too, since they live on their own link.
Does Moosend work for audiences in the US, UK, Canada, and Australia?
Yes, as long as you follow each country’s email rules: consent, a physical address, and a working unsubscribe link. Moosend adds the tools, but compliance is on you.
Final thoughts
If you’ve read this far, you already know more about how to use Moosend than most people who sign up and stare at the dashboard. The free trial is the cheapest way to find out whether it fits how you work.
Build the list, send one campaign, and set up the welcome series. If it feels good after 30 days, you’ve got a working email system. If it doesn’t, you’ve lost nothing but an afternoon.
Ready to try it? Start your Moosend free trial.

Naresh runs ToolCheckHQ and builds affiliate sites and YouTube channels around marketing software. He reviews tools by digging through pricing pages, plan limits, help docs and user complaints, then explains in plain English what a tool really costs and who it suits.

Pingback: Moosend Pricing 2026: Plans, Costs and Free Trial